I am working on a project that uses Jenkins. We had a couple of different options for deploying Jenkins.
We use Red Hat Linux, so we could run Jenkins as a command line service in the background, or we could deploy it to a servlet container like Tomcat or Glassfish. But since we are already using the WebLogic Server it made most sense to deploy Jenkins there.
Using WebLogic for Jenkins does not work out of the box, so here is the steps I wend thorough to get it up and running on a WebLogic Server 10.3.6.
Overview
- Prepare the OS
- Prepare WebLogic
- Change the jenkins.war
- Deploy the war file
- Configure security
- Configure misc
Prepare the OS
Jenkins stores it’s files under $JENKINS_HOME which defaults to ~/.jenkins.
You can change $JENKINS_HOME via .bash_profile.
su - oracle
echo "export JENKINS_HOME=/u01/app/jenkins" >> .bash_profile
cat .bash_profile
Remember to restart the WebLogic Server and the Node Manager for this to take effect.
Prepare WebLogic
There is a good chance that you will get the below error, so tell the JVM that it is running headless.
First access AWT is not properly configured on this server. Perhaps you need to run your container with “-Djava.awt.headless=true”?
java.lang.InternalError: Can’t connect to X11 window server using ‘localhost:10.0’ as the value of the DISPLAY variable.
Here I set the Java parameters in DOMAIN_HOME/bin/setDomainEnv.sh.
# *************************************************************************
# lorenzenp Begin
# *************************************************************************
if [ "${SERVER_NAME}" = "" ] ; then
        SERVER_NAME="AdminServer"
        export SERVER_NAME
fi
if [ "${SERVER_NAME}" = "AdminServer" ] ; then
  USER_MEM_ARGS="-Xms256m -Xmx768m -XX:MaxPermSize=350m"
elif [ "${SERVER_NAME}" = "jenkins" ] ; then
  USER_MEM_ARGS="-Xms256m -Xmx768m -XX:MaxPermSize=350m -Djava.awt.headless=true -Dfile.encoding=UTF8"
fi
# *************************************************************************
# lorenzenp End
# *************************************************************************
Remember to restart the WebLogic server.
Change the jenkins.war
Download the latest war file from http://jenkins-ci.org.
I followed the steps outlined here.
We need to add some stuff to the war file, so download jcl-over-slf4j-1.6.2.jar and weblogic.xml.
Add the files.
# Unpack the war archive
/u01/app/oracle/product/java_current/bin/jar xf jenkins.war
# Add the files
cp weblogic.xml jenkins/WEB-INF/.
cp jcl-over-slf4j-1.6.2.jar jenkins/WEB-INF/lib/.
# Create a new war file
/u01/app/oracle/product/java_current/bin/jar cfM jenkins.war -C jenkins .
You can of cause also deploy the exploded directory if you prefer.
Deploy the war file
Copy the file to wherever you keep you deployments and deploy it.
I deployed via the Admin Console and for some reason it defaults to installing the war file as a library, so I change from “Install this deployment as a library” to “Install this deployment as an application”.
Configure security
Default no security is configured. Security can be configured in several ways, here I use the build in user-database.
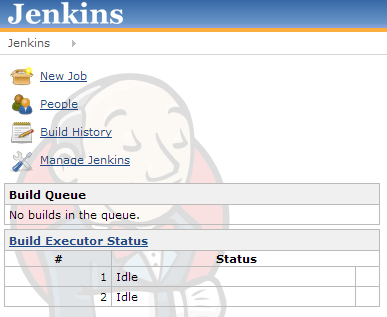
Access http://wintermute:8001/jenkins and press the “Manage Jenkins” link.

You should now get a couple of warnings.

The UTF-8 bit I ignore and if anybody used non-ASCII characters they will get a beating 🙂
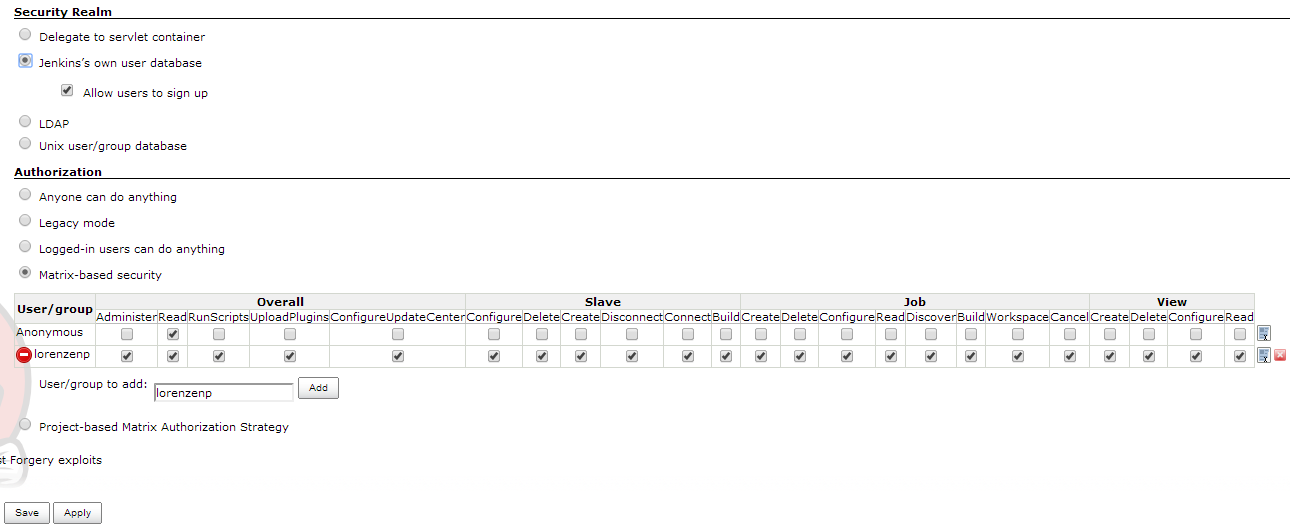
Press the Setup Security button and check “Enable security”.
– Select “Matrix-based security”.
– Select “Jenkins’s own user database” and “Allow users to sign up”.
– “Add” a user. Here lorenzenp is allowed to do anything.
– Press the Save button.

You have not created a user here, you have only configured what a user with this user name are allowed to do.
Restart Jenkins. I do this by restarting the Managed Server. When it is back up access http://wintermute:8001/jenkins and press the log in link in the top right corner.
Press the “Create an account” link and create a user with the same user name as the one you have configured security for. When you are finished you should be logged in.
Configure misc
The only other default configuration I do is adding a mail server. The rest is setup in the individual jobs.
Press the “Manage Jenkins” link and the “Configure System”.


 Twitter
 LinkedIn
 GitHub
 GoodReads
 Last.fm
Comments on this entry are closed.